Discovery :
Discovery in ServiceNow is a process to identify the IT infrastructure components like database, servers and network devices and it maps relations in Configuration Management Database(CMDB).Discovery is a powerful tool to understand IT infrastructure and to manage reliable CMDB to drive IT operations and decision making.
There are many ways to discover the infra and maintain CMDB up to date. Let us go through few ways of discovery.
Agent less Discovery:
Agent less discovery is a method used to discover IT infra without installing agents on target devices and uses protocols like WMI,SSH,SNMP to gather information about target devices this method encouraged when the organization is using legacy systems or network devices we can say that this method is used when we can’t install agents on target devices.
Agent less discoveries:
- Credential based discovery.
- Credential less discovery.
1. Credential based discovery:
Navigate menu > Credentials > New > Select type > enter fields like user name password etc. details that are required
Credential based discovery uses probes, patterns, credentials of target to discover the devices.
The discovery of infra is done by validating credentials of discovery devices. It is mandatory to configure credentials in credential table.so that when we schedule discovery, based on the result of scanning phase in classification phase the credentials are checked and if authorized based on IRE rules the CI of device is created or updated in CMDB table.
Plugins: Discovery plugin (com.snc.discovery)
How to do Credential based Discovery?
- Install a mid server in customer environment either by using Zip or MSI file on windows or Linux system which is connected to same network to be discovered.
- The mid server to be up and running in the host as shown below.

Before scheduling discovery ask the following to customer
- What type of devices do they have in the network?
- How many IPs to be discovered?
- Any ports are customized or using default ports?
- Provide them a document about ports opening.
- Ask them to configure same credential for same type of devices to make job easy.
- And tell them to provide the target IP list, credentials of devices that to be discovered.
How to do credential based discovery?
Enter the credentials
Navigate menu > Credentials > New > Select type > enter fields like user name password etc. details that are required.
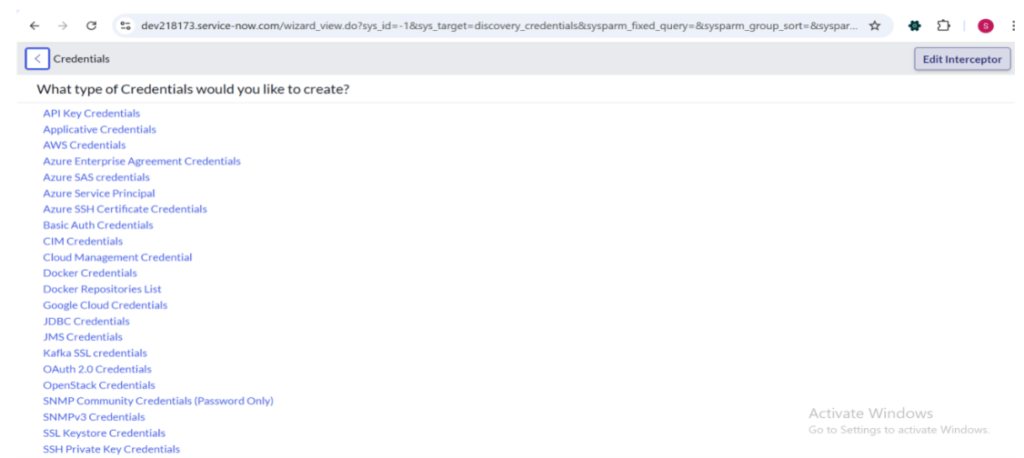
Lets see how to create credentials for windows select New > Windows Credentials
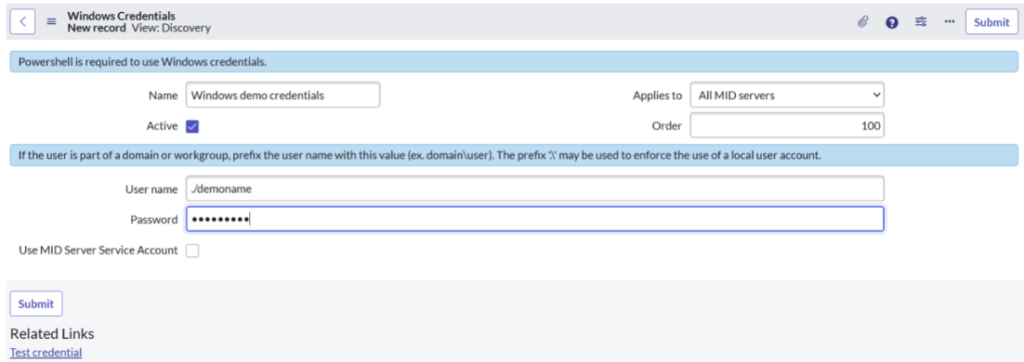
Save >click test credentials
Test Credentials: After entering the credentials if the test is successful then only windows devices can be discovered.
- If you are done with port openings, credentials
- Finally schedule a discovery and run discovery.
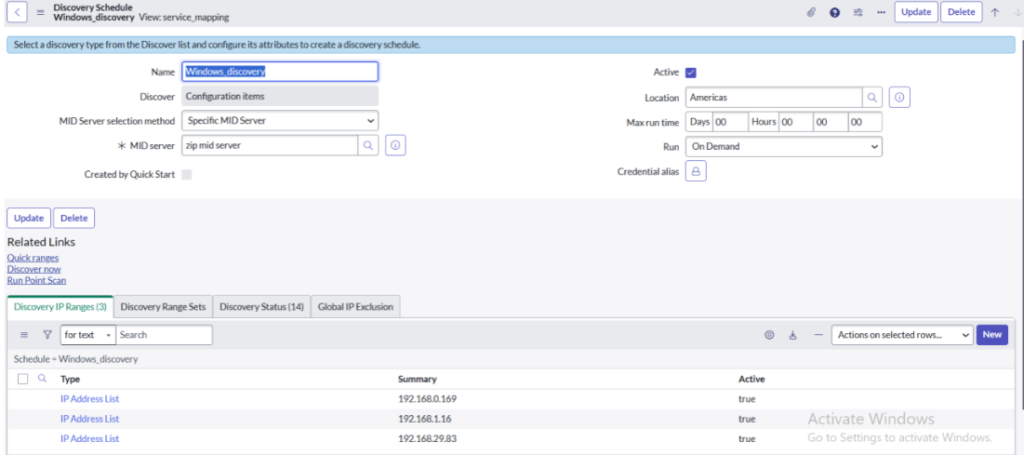
Save and click Quick ranges related list give IP range to be discovered.
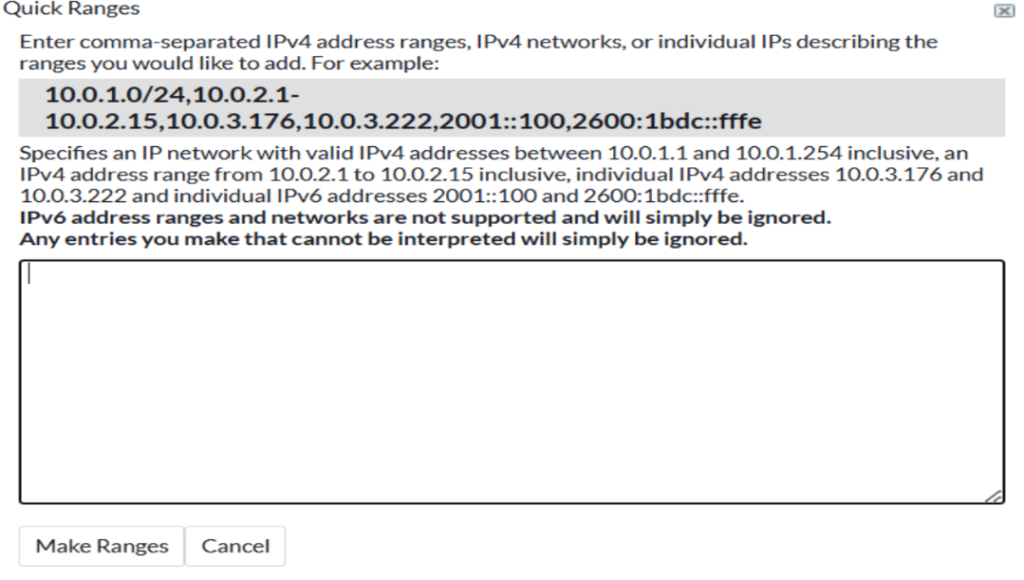
Make ranges and click Discover now in related list.
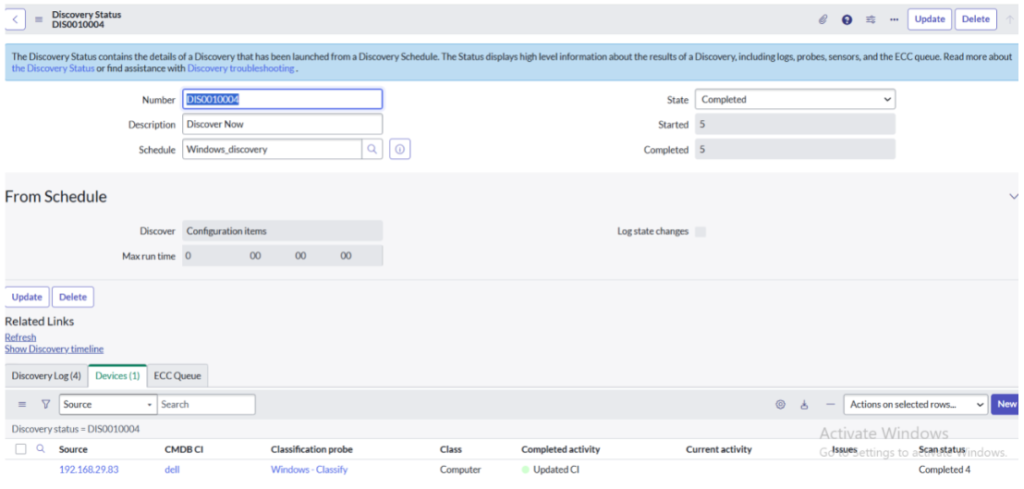
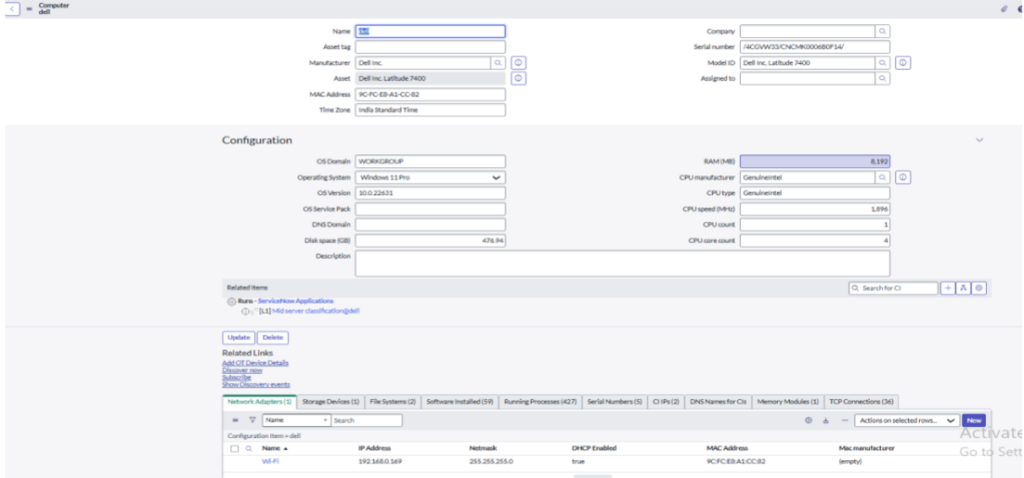
The discovered devices visible in devices section.
2. Credential less discovery :
Credential less discovery discovers the devices without using credentials. It just discover devices by scanning network. Credential less discovery is used when the customer says he don’t have the credentials or when he don’t give the credentials or when credentials missing or when credentials of that subnet cannot be used for long time. But this discovery brings only basic information of devices like IP address, host name, open ports.
How to do credential less discovery?
The mid server administrator should enable credential less discovery.
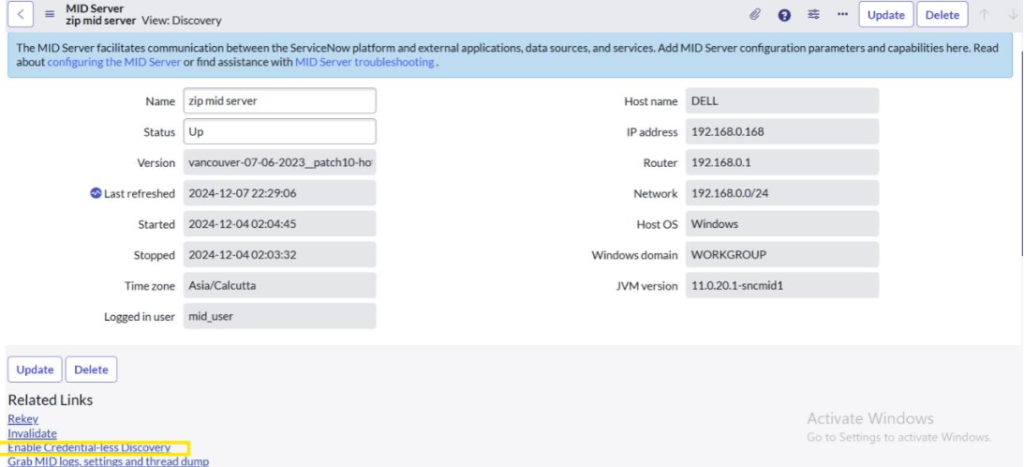
One way to Install Nmap by clicking enable credential-less discovery in related list of mid server.
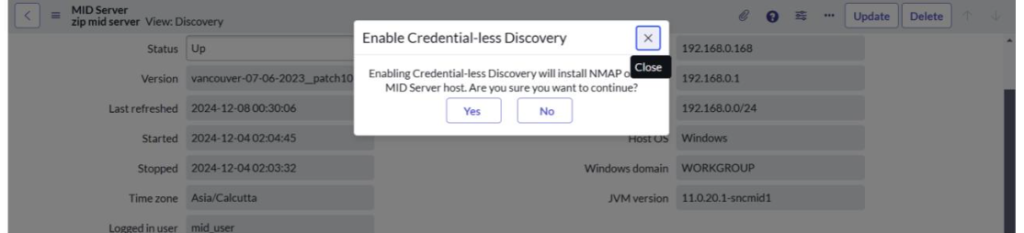
- If customer doesn’t allows to install Nmap on host system Nmap can be installed manually. After Nmap is installed the Nmap capability is automatically added into capabilities of mid server and capability is removed when Nmap is uninstalled.
- When the credential based discovery failed to identify CI due to authentication failure, discovery automatically selects Nmap to gather basic information of CI.
- The CI created using Nmap classified under hardware class unlike they are not classified under specific classes.
- Credential less discovery run is not recommended on cloud based services.
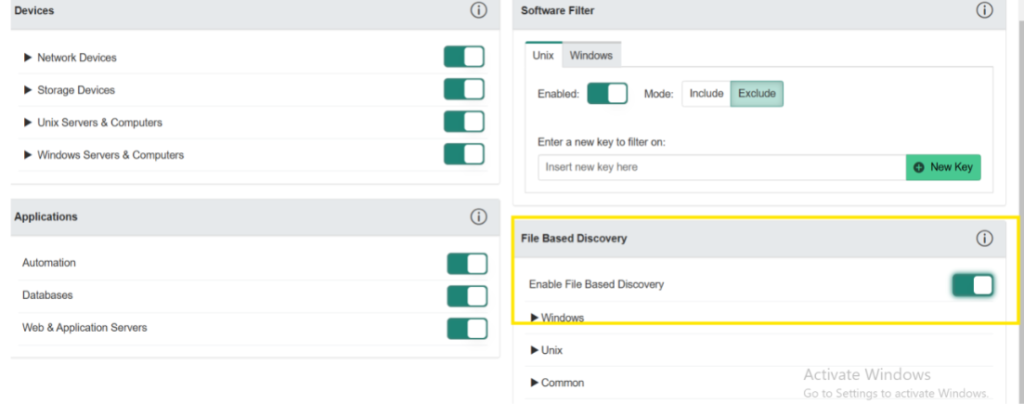
3. File Based Discovery:
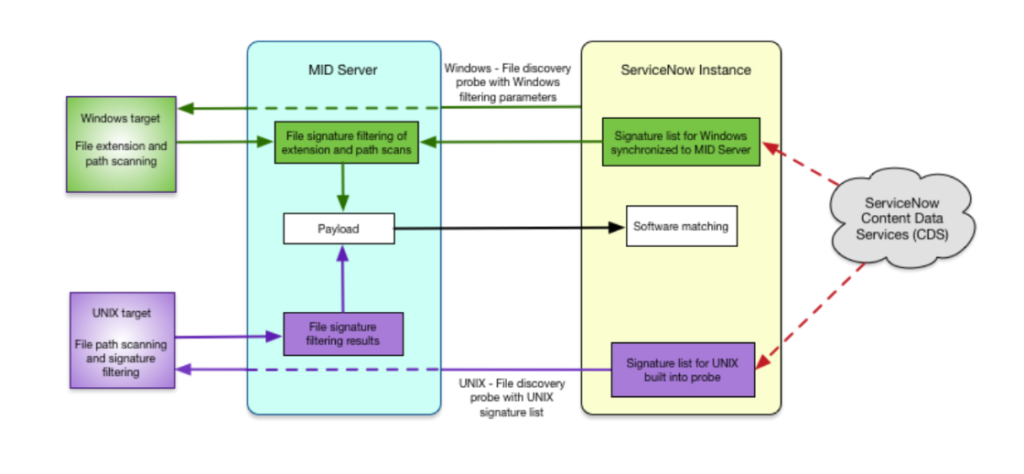
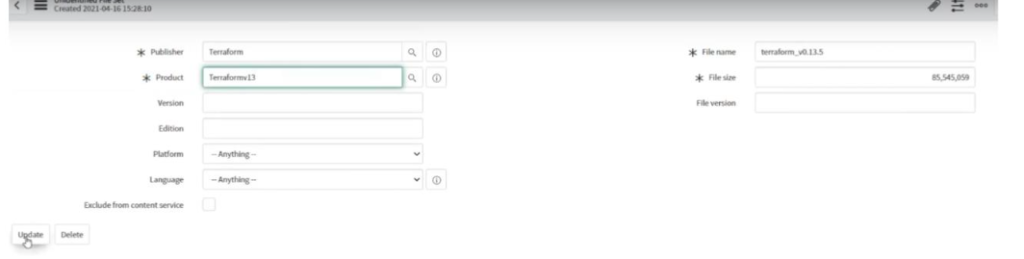
File based Discovery helps to identify the software running on windows, Linux and device which can stores files. File based Discovery is triggered in the exploration phase of normal discovery. It send the probes of all extension to find files on device. Based on the result payload the sensors checks for matched software and updates or creates record in “cmdb_sam_sw_install” table. To identify the software SAMP should be active without SAMP the software record cannot be created only the files will be stored in “cmdb_file_information” table.
File based discovery filtering path:
Plugins:
[com.snc.discovery.file_based_discovery] for file based discovery. Discovery definitions>configuration console>enable file based discovery. Once if file based discovery plugin is activated automatically SAM-File signature Normalization plugin[com.snc.file_signature_normalization] will also get activated.
Configuration console:
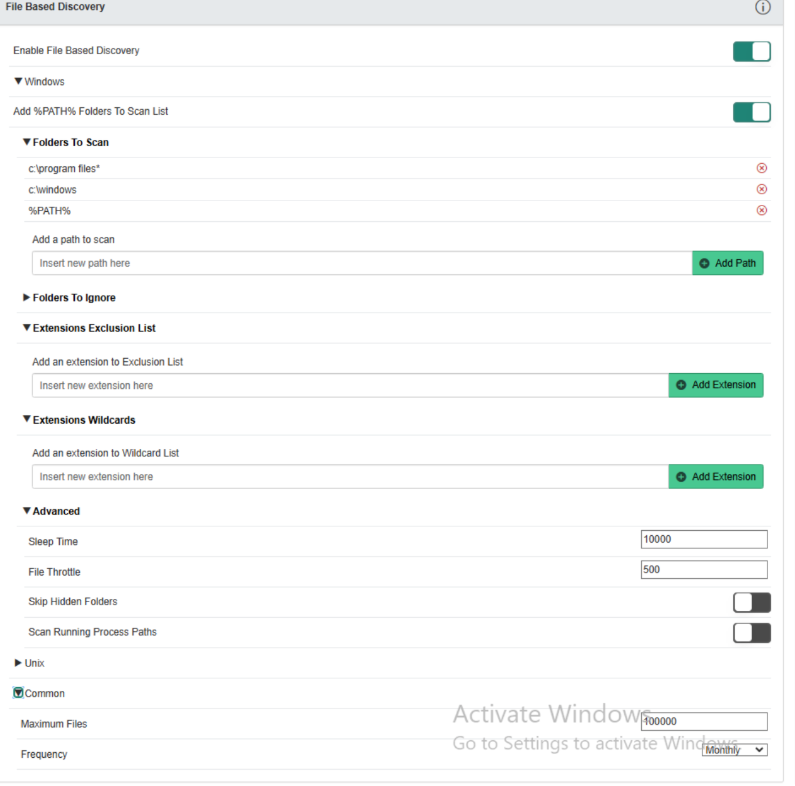
Folders to scan: The path of folder/application are added here to scan and discover them.
Folders to Ignore: The path of files which should not be discovered within the folder given in folder to scan is given here.
Extension Wildcards: The extension of files are given here to scan those extension files.
Advanced:
Sleep time: Time in milli seconds to sleep after interval during scanning of files.
File Throttle: The number of files to be discovered before sleeping.
Common:
Maximum files: The number of files that can be able to scan per CI/IP.
Frequency : The file based discovery runs accordingly default run time will be monthly it mean if once file based discovery runs then after completing the interval only it can run again.
Note: It is recommended to not change the default value to avoid performance issues for example if the frequency of file based discovery is set to less than monthly the files to be scanned increases the load on target processor and damages the target device.
File based Discovery during exploration phase :
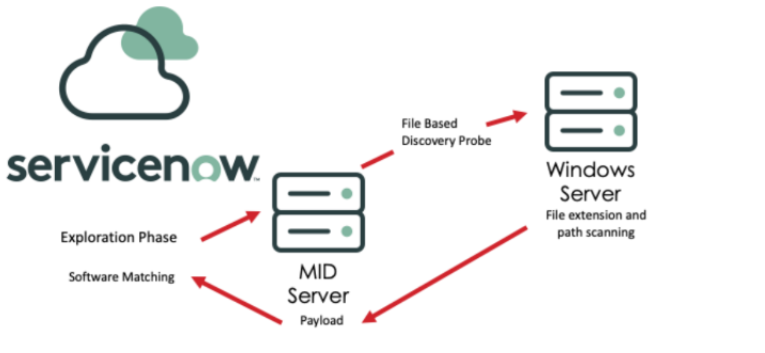
- The file based discovery probes[windows-file discovery, Linux-file discovery etc.… probes in discovery_probe table] are triggered during exploration phase to get data mentioned in ECC queue name field and execute scan searching for specific file names in path given by using probe parameter. The result of scanned files is returned in payload.The sensors try to match installed software using name, size, version returned by probe.
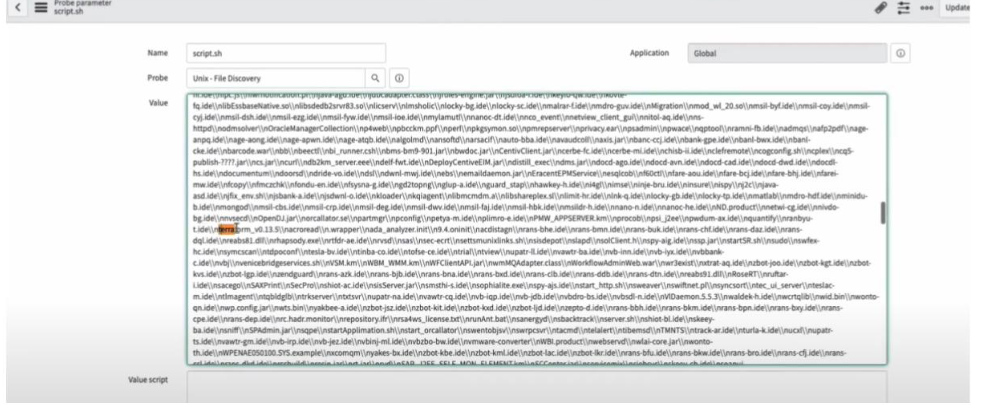
- The probe parameter value defines what file availability to be checked.if we want to discover new software we need to add custom files so that servicenow will identify those files during scanning and will be able to discover that software.
- To capture custom software file we need to define path and file name.
Define Custom file:
We define custom file to discover the software which are not defines/installed in OOB library installed software.so by creating the custom file we say the system to identify the discovered file by looking into custom files created.
Custom file creation:
- samp_custom_file_name.list
- once custom file created cannot delete them but can be inactivated
- Give path in configuration console
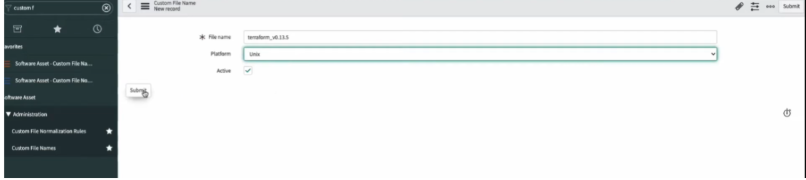
- To add ability to discover custom software. We need to add the custom file parameter value of that particular probe like windows-file discovery, Linux-file discovery etc..
- To add parameter we need to run the schedule.which by default runs for every one hour to update the new entries.
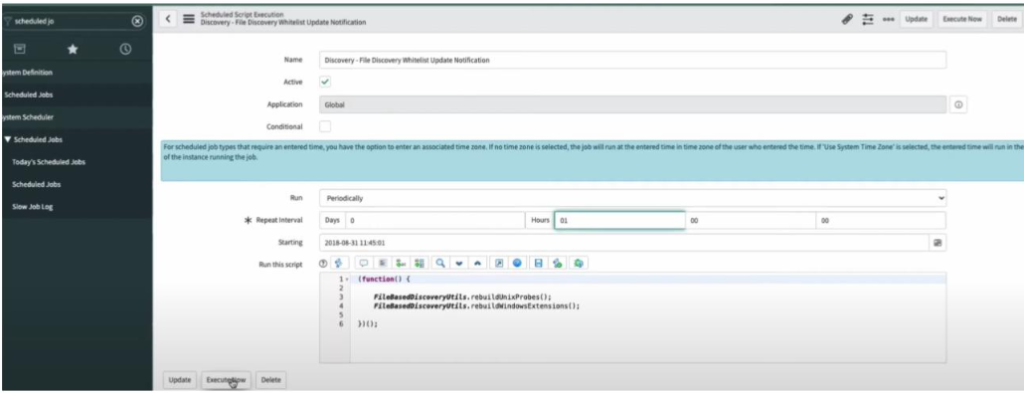
Click on execute now or wait for 1 hr to run schedule so that we are able to see that custom file the value of probe.
Then after we run the discovery
- The ServiceNow instance process the identified file using name, size, version to match software package. If match found creates record in cmdb_sam_sw_install table otherwise file stored in unidentified file table[cmdb_unidentified_file_set].
- If the files are identified as unidentified file we to create a custom software product
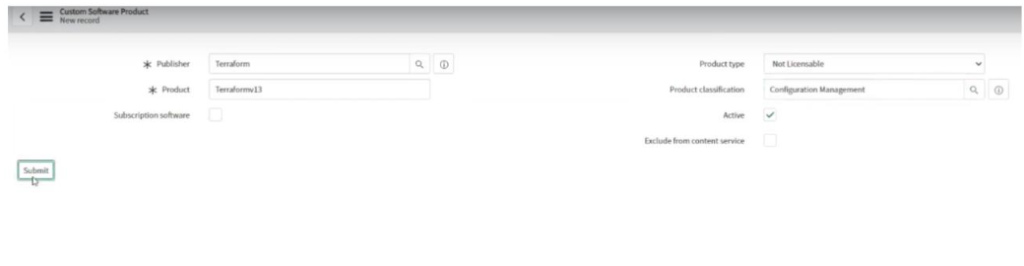
- To select publisher name if not available we need to create in core_company table.
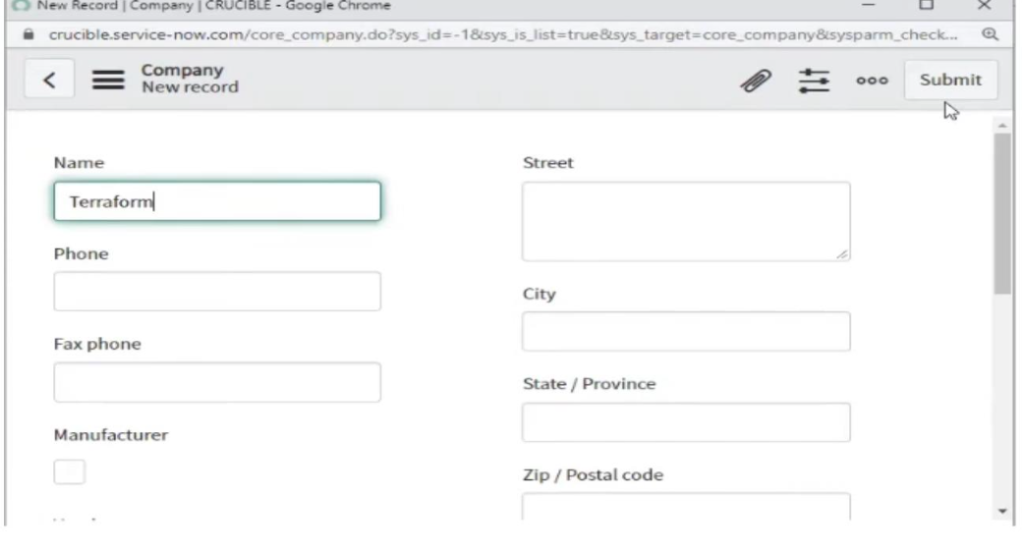
- Then after we need to create unidentified file set.
- Run the discovery. The software will be discovered
4. Agent Client Collector:
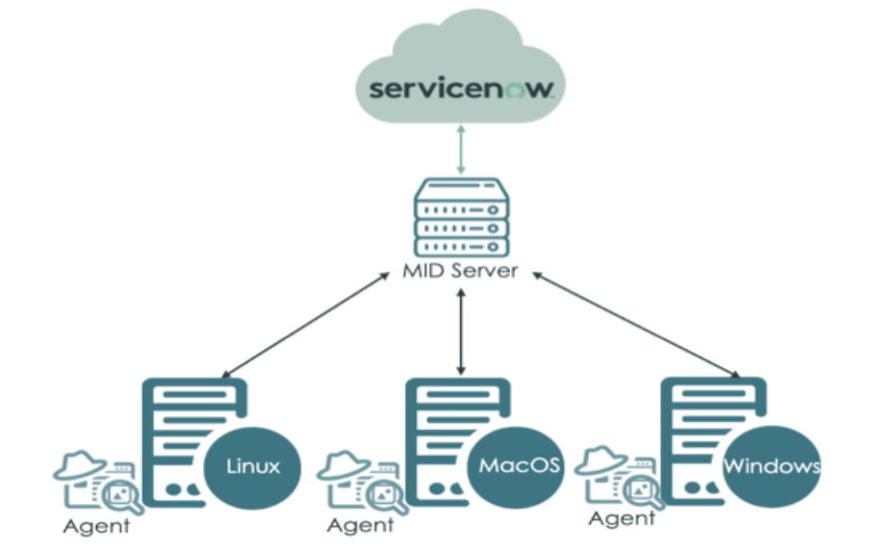
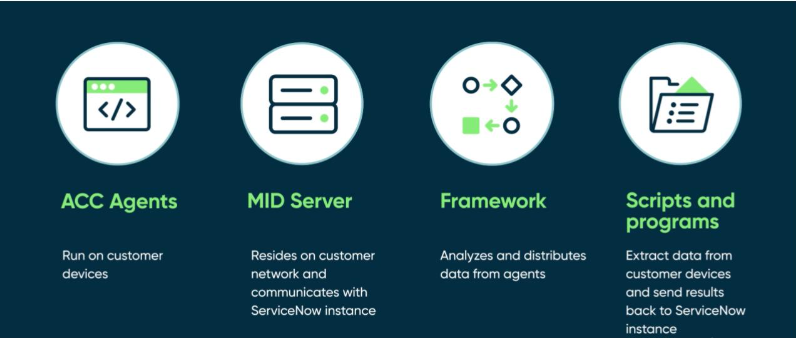
Agent client collector(ACC) is one way to discover devices. The horizontal discovery may not be able to discover infra devices at that time it is ideal to use ACC.ACC is an agent which is installed on Windows, Linux, macOS devices of organizations infrastructure. So this agent collects data of health, security server on which it is installed and send it to ServiceNow instance through mid server. It is helpful to monitor company infra like servers, databases, and application servers.
Flow:
- On ServiceNow instance,the user defines policies.policies includes monitoring classes or classes of CIs,checks,check parameters and frequency.
- The mid server periodically get the checks form instances and sent them to agents.
- The agents runs the checks on devices and collects data on CIs and sends back to instance via mid server.
- Plugins: Agent client collector framework, Agent client collector visibility.
- The base agent client collector have components
- ACC framework fetches data from agents and send to other agent applications. ACC-monitor, ACC-visibility, ACC-logs analytics, Security Incident Response, Live CI view, Software assert management.
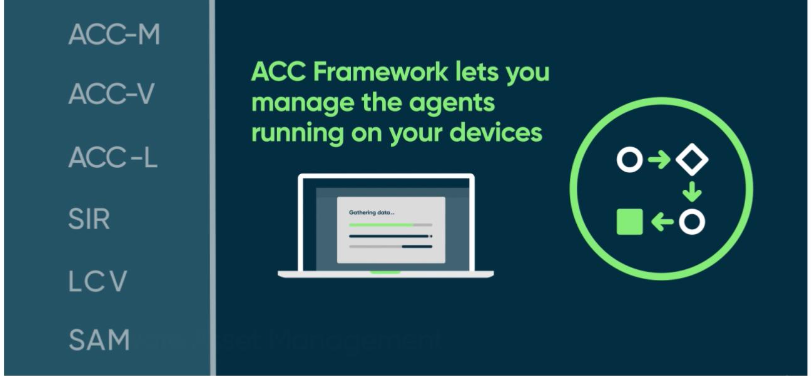
- ACC-Monitor: It monitor the health and performance of the environment and ensure that application and infra running properly
- ACC-Visibility: It collects data related to TCP connections, running processes and characteristics information of storage devices, file systems, physical servers, virtual machines etc.
- ACC Log Analytics: Logs data from windows and Linux hosts.
How to discover using Agent client collector:
Two EC2 instances are needed .
- One for ACC installation.
- One for mid server installation.
One personal ServiceNow Agent client collector for visibility, agent client collector for frame work plugins need to be installed in personal instance. instance to capture information provided by ACC.
- Install mid server in one EC2 instance using servicenow instance.
- Ensure mid server is running and up
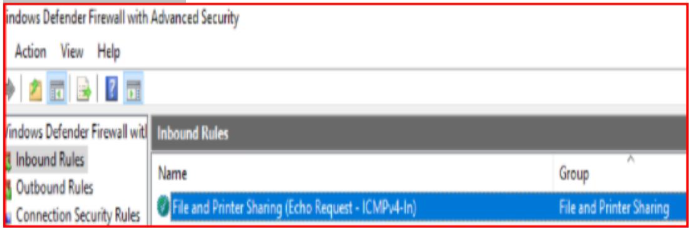
- Create inbound rule and allow port 8433(default port of ACC).
- Enable below rule
ACC agent download and installation :
- Go to other EC2 instance which is allocated for ACC installation.
- Open ServiceNow instance URL navigate Mid servers >open mid server>click Setup ACC List
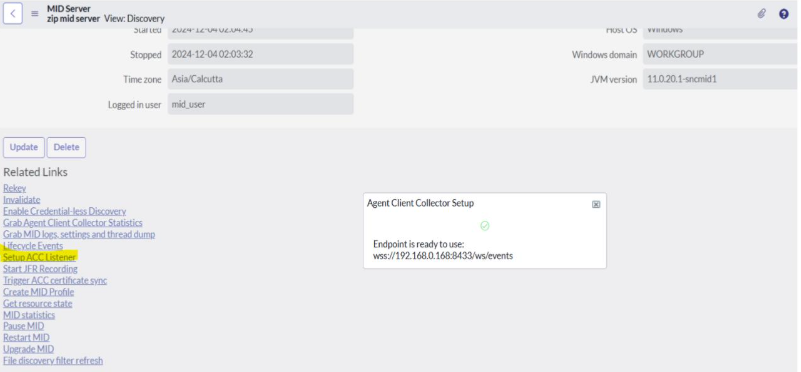
Go to Agent Client Collector > Deployment > MID Web Server. You can see the entry here.
- Go to Agent Client Collector > Deployment > WebSocket Endpoint. You can see the entry here as well
- Go to Agent Client Collector > Deployment > MID Web Server API Key copy API.
- Navigate>Agent Downloads>Download the file accordingly.
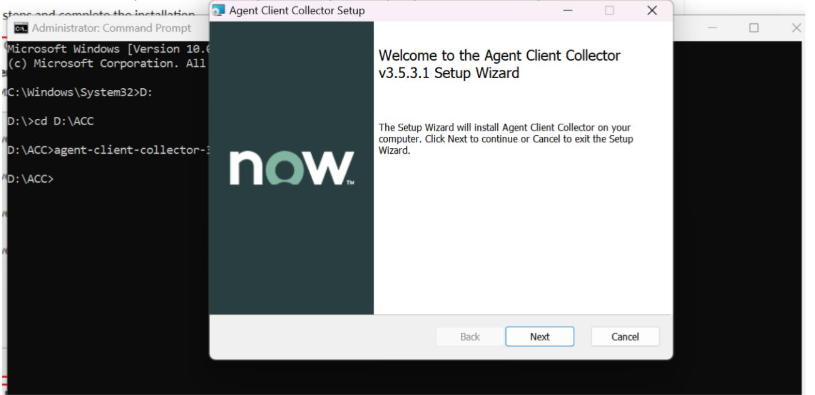
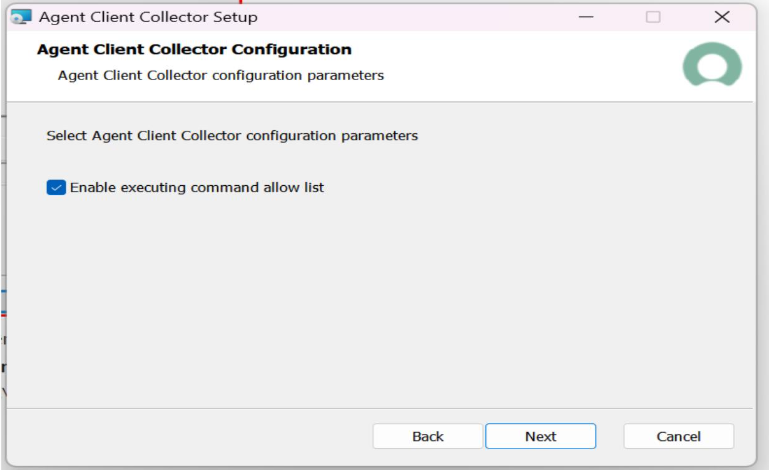
- Open command prompt(run as administrator)Install the agent client collector by following the steps.
- Run the file installed and click next.
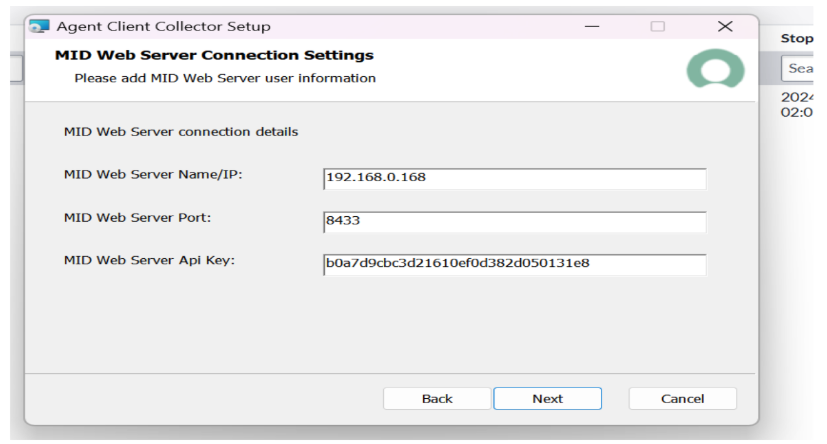
- Click next ,set up mid server connections to agent by providing mid server IP, Port, paste API key which is copied from mid web server API key table in ServiceNow instance.
- Click next and use existing local user.

Click next
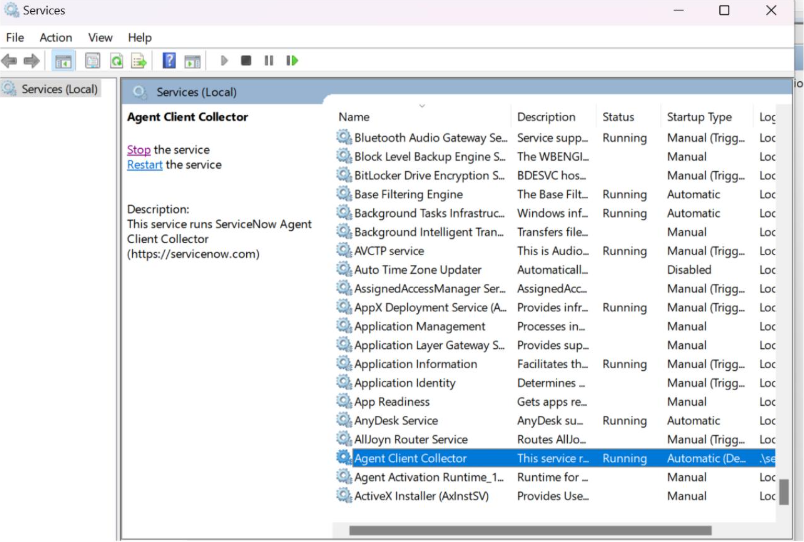
- Check for agent client collector service.
- Now Open Folder > Agent Client Collector>Config> acc.yml and configure the api key and other info .
- Go to command prompt and copy path up to bin and type acc self-test.
- Make sure all the tests passes.
- The record get created in agent client collector table.
- Click collect data button so the data will be collected by agent and CI is created.
Thank you for taking the time to read our content! We appreciate your interest in SotioTech and look forward to helping you achieve your IT service management goals with our ServiceNow solutions. If you have any questions or need assistance, feel free to reach out to us through our page www.sotiotech.com and our pages. Stay connected with us on LinkedIn for the latest update.